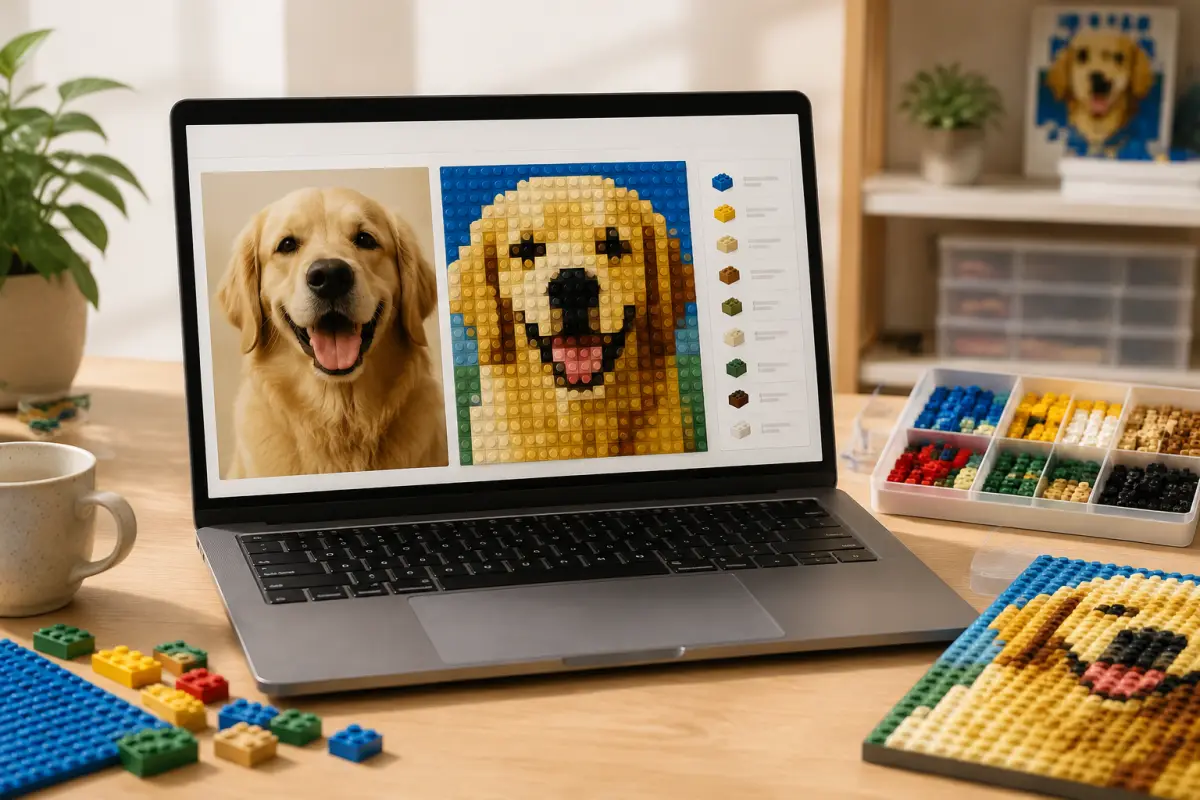
LEGO Mosaic Size Guide: Choose the Right Grid for Your Photo
Choosing a grid is one of the most important decisions when you turn a photo into brick art. Brick Mosaic Maker lets you upload a JPG, PNG, or WEBP image, choose a preset or custom grid, crop or fit the image, select a color palette, adjust brightness, and generate a preview with a color Parts list. This guide compares practical grid sizes so you can balance recognizable detail with the number of cells you will sort and build.
How grid size changes a LEGO mosaic
A grid describes the number of color cells across and down the pattern. Width multiplied by height gives the total cell count. Every cell represents one position in the generated design, so a larger grid can preserve smaller shapes but also creates more pieces and more building work.
Brick Mosaic Maker provides 16 x 16, 48 x 48, 64 x 64, 96 x 96, 64 x 48 landscape, and 48 x 64 portrait presets. Custom size accepts a width and height from 8 to 128 cells, which is how you can create a 32 x 32 pattern. The generated Parts list counts the cells assigned to each color; it does not include a border, base, backing, or mounting hardware.
Grid size comparison
| Grid | Total cells | Good starting use | What to watch |
|---|---|---|---|
| 16 x 16 | 256 | Quick tests, bold icons, simple logos, and small decorations | Fine facial features, thin lettering, and narrow edges may merge |
| 32 x 32 | 1,024 | Custom-size step between a quick test and a medium portrait | Enter 32 for width and 32 for height under Custom size; it is not a preset |
| 48 x 48 | 2,304 | A practical square starting point for many portraits and personal photos | Plan for more color sorting and building time than 16 x 16 |
| 64 x 64 | 4,096 | Portraits, artwork, or lettering that needs more definition | Requires more compatible pieces and a larger physical layout |
| 96 x 96 | 9,216 | Detailed artwork or designs viewed from farther away | Large material count and longer sorting and placement sessions |
| 64 x 48 | 3,072 | Wide photos where landscape composition matters | Use Fit whole image when you need every edge to remain visible |
| 48 x 64 | 3,072 | Tall subjects and portrait-oriented compositions | Check that the subject fills the vertical frame without excess background |
Step-by-step: choose and test a grid
1. Start with the photo and the physical goal
Open Brick Mosaic Maker and use the upload area to choose a JPG, PNG, or WEBP image. The site accepts files up to 20 MB, with a maximum width or height of 6,000 pixels and a maximum of 25 megapixels. A clear subject with strong edges is more important than simply having a very large source file.
Estimate how much time and material you can manage. A small icon may be clear at 16 x 16, while a portrait often benefits from 48 x 48 or 64 x 64. The grid is a count of cells, not a promise about the final physical width: your chosen brick or tile size determines that separately.
2. Select a starting grid
Use 16 x 16 for a fast readability test. Use 48 x 48 as a balanced square starting point for a portrait or single subject. If the subject contains important eyes, facial features, thin lines, or small lettering that disappear, move to 64 x 64 or 96 x 96.
For a 32 x 32 test, choose Custom size, enter 32 as the width and 32 as the height, and generate the pattern. This gives you 1,024 cells without implying that 32 x 32 is a built-in preset.
3. Match the grid shape to the photo
Choose 64 x 48 landscape for a wide scene and 48 x 64 portrait for a tall subject. Use Crop when the main subject should occupy more of the grid. Use Fit whole image when the full composition matters; different aspect ratios can leave unused space around the image.
4. Generate a preview before committing
Keep the initial brightness at 100% and compare the Classic brick colors, Soft colors, and Grayscale palettes. Generate the mosaic, then inspect the subject at normal viewing distance and with Preview zoom. Check the outline, eyes, lettering, and other features that define the image.
If the pattern is too dark or washed out, adjust Brightness in small steps and generate again. Change one setting at a time so you can identify which grid, crop, palette, or brightness choice improved the result.
5. Read the Parts list and total cell count
After generation, the result shows the selected dimensions and total cells. The Parts list shows the quantity for each generated color. Those quantities should add up to the total cell count for the pattern. Copy them into an inventory checklist and compare them with the compatible pieces you actually have.
The list represents color cells in the generated pattern. Decide separately how to handle a border, base, frame, backing, gaps, piece thickness, and mounting method. If a color is unavailable, compare a visual substitute or regenerate with another palette and recheck the new counts.
Examples for common photo types
Simple logo or symbol
Try 16 x 16 first when the design has broad shapes and little fine text. Inspect one-cell-wide lines and corners at higher zoom. If they are not readable, use a 32 x 32 custom grid or move to 48 x 48.
Square portrait
Start with 48 x 48, Crop, Classic brick colors, and 100% brightness. Center the face so it occupies enough cells. If the eyes or facial outline blend into the background, try a tighter crop, a brightness adjustment, or 64 x 64 before choosing pieces.
Detailed artwork
Use 64 x 64 or 96 x 96 when small shapes are central to the design and you can support the larger material count. Review the preview from the distance where the finished mosaic will be viewed, not only while zoomed in on the screen.
Wide or tall photograph
Use 64 x 48 landscape or 48 x 64 portrait to reduce unnecessary cropping. Fit whole image preserves the complete frame, while Crop gives the main subject more space. Compare both when the composition is important.
Common questions
Is 32 x 32 available as a preset?
No. The site lists 16 x 16, 48 x 48, 64 x 64, 96 x 96, 64 x 48 landscape, and 48 x 64 portrait as presets. To make 32 x 32, choose Custom size and enter 32 for both dimensions.
How many cells are in each square grid?
16 x 16 has 256 cells, 32 x 32 has 1,024, 48 x 48 has 2,304, 64 x 64 has 4,096, and 96 x 96 has 9,216. The Parts list breaks that total down by generated color.
Which grid is best for a beginner?
Use 16 x 16 for a quick test or a simple symbol. A 48 x 48 grid is a practical starting point for many square portraits because it preserves more recognizable structure while keeping the project easier to manage than a very large grid.
Does a larger grid always make the image better?
No. A larger grid can represent more positions, but it cannot restore detail that is missing from a blurry, dark, or crowded photo. Improve the source and crop first, then increase the grid when the preview still loses important features.
Does the Parts list include my base or border?
No. It counts the generated color cells only. Plan the base, border, backing, frame, gaps, and mounting separately for the physical build.
Can I save the finished guide?
Yes. Use Download PNG with Web, HD, Print, or Custom pixels output, or select Print / Save PDF to use the browser print workflow. Export the guide because recent mosaics remain in the browser on the current device rather than serving as a cloud backup.
Final selection checklist
- The grid shape matches the photo composition.
- The subject remains recognizable at normal viewing distance.
- The total cell count fits your material and time limits.
- The Parts list has been compared with your available colors.
- Crop, palette, and brightness choices have been tested before ordering.
- Base, border, mounting, and any color substitutions are planned separately.
- The PNG or PDF guide is saved outside the browser history.
The right LEGO mosaic size is the smallest grid that keeps the important shapes clear for your intended viewing distance and build plan. Start small, compare a preview, and increase the grid only when the image truly needs more cells.