How to Turn a Picture Into a LEGO Mosaic: A Free Step-by-Step Guide
Free picture-to-brick guide
Turn a picture into a LEGO mosaic without designing every square by hand
The basic method is simple: prepare a clear picture, convert it to a limited-color grid, review the preview, and use the grid as a building guide. The choices you make before conversion, especially the crop, grid size, contrast, and palette, determine whether the finished mosaic is recognizable and practical to build.
The universal picture-to-mosaic method
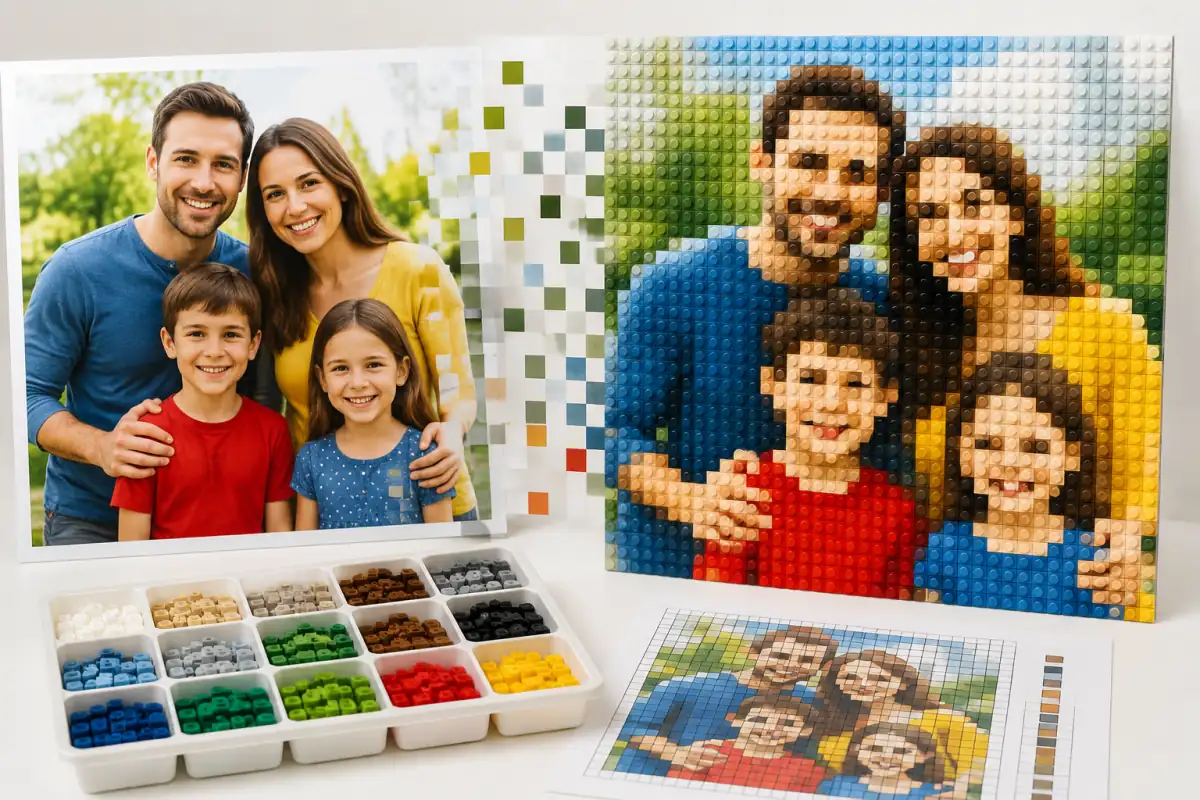
Whether you use an online generator, pixel-art software, or graph paper, the conversion follows the same logic. A picture contains thousands or millions of pixels. A brick mosaic reduces that image to a manageable grid, then maps each grid cell to an available brick color.
- 1Simplify the composition.
Crop around the subject and remove visual clutter that will not survive at brick scale.
- 2Choose the grid dimensions.
Every cell represents one position in the pattern, so width multiplied by height gives the maximum cell count.
- 3Limit the colors.
Map the picture to a brick-friendly palette instead of trying to reproduce every photographic shade.
- 4Review and refine.
Compare crops, sizes, palettes, and brightness before you buy or sort pieces.
- 5Export and build.
Use a numbered or colored grid, plus a parts count, to assemble one row or section at a time.
Picture requirements: what converts well?
Image resolution is rarely the main limitation. A modest but sharp image can produce a better mosaic than a huge, blurry photo. Composition and contrast matter more because the final pattern contains far fewer cells than the original picture.
Choose pictures with
- • One dominant face, pet, object, logo, or building
- • Sharp edges and visible separation from the background
- • Even lighting with clear highlights and shadows
- • A subject large enough to fill most of the crop
- • Simple shapes that remain readable at a distance
Avoid or edit pictures with
- • Motion blur, heavy compression, or soft focus
- • Several small faces spread across a wide scene
- • A subject and background with nearly identical tones
- • Thin text, tiny patterns, or intricate line work
- • Large borders or empty areas that waste grid cells
How to choose the right mosaic size
Grid dimensions control both visual detail and project scope. For a complete one-piece-per-cell layout, the cell count is width × height. A 48 × 48 pattern therefore has 2,304 positions, while 64 × 64 has 4,096.
| Grid | Cells | What to expect | Good uses |
|---|---|---|---|
| 16 × 16 | 256 | Very simplified; bold silhouettes only | Icons, tests, small decorations |
| 32 × 32 | 1,024 | Basic features with manageable effort | Logos, simple portraits, pets |
| 48 × 48 | 2,304 | Useful balance of recognition and scale | Portraits, gifts, first serious build |
| 64 × 64 | 4,096 | More facial and background detail | Detailed art and larger displays |
| 96 × 96 | 9,216 | High detail with much more sorting and building | Large wall pieces and collaborative projects |
Match the grid aspect ratio to the picture. Use a portrait grid for a vertical photo, a landscape grid for a wide scene, or crop to a square when the subject is more important than the original edges. Always confirm physical dimensions from the actual building elements and base system you plan to use.
Step by step: turn your picture into a free LEGO mosaic pattern
Prepare the picture
Use the original JPG, PNG, or WEBP when possible. Straighten it, crop away empty space, and make a modest brightness or contrast correction if the subject blends into the background. Do not over-sharpen; clean shapes matter more than artificial texture.
Upload it to a mosaic generator
Open the free Brick Mosaic Maker and choose your image. The site processes the picture locally in your browser, so the source image does not need to be sent to the site server during conversion.
Select crop or fit
Crop fills the grid and gives the subject more cells. Drag and zoom until the important features are centered. Fit whole image preserves every edge but can leave unused space when the image and grid have different proportions.
Set the grid size
Begin with 48 × 48 for a typical single-person portrait. Try 16 × 16 as a fast composition test, or move to 64 × 64 and above only when the extra detail justifies the larger build. Custom dimensions from 8 to 128 cells let you match unusual formats.
Choose colors and brightness
Compare a classic brick palette, softer colors, and grayscale. Grayscale is useful for checking whether the picture works through shape and contrast alone. Adjust brightness in small increments; extreme changes can erase shadows or highlights that define the subject.
Generate and inspect the preview
Look at the mosaic both close up and from several steps away. Check the silhouette, eyes, mouth, key edges, and background separation. If it does not read clearly, change one variable at a time: crop first, then grid size, palette, and brightness.
Download the guide and parts list
Save a PNG for on-screen reference, or print and save a PDF. Review the color quantities before sourcing pieces. The list counts color positions in the chosen pattern; confirm actual part types, availability, baseplates, and mounting materials separately.
Build in controlled sections
Sort pieces by color, mark the top of the guide, and build row by row or divide a large design into labeled sections. Stop regularly and view the work from a distance so an orientation or color mistake does not spread.
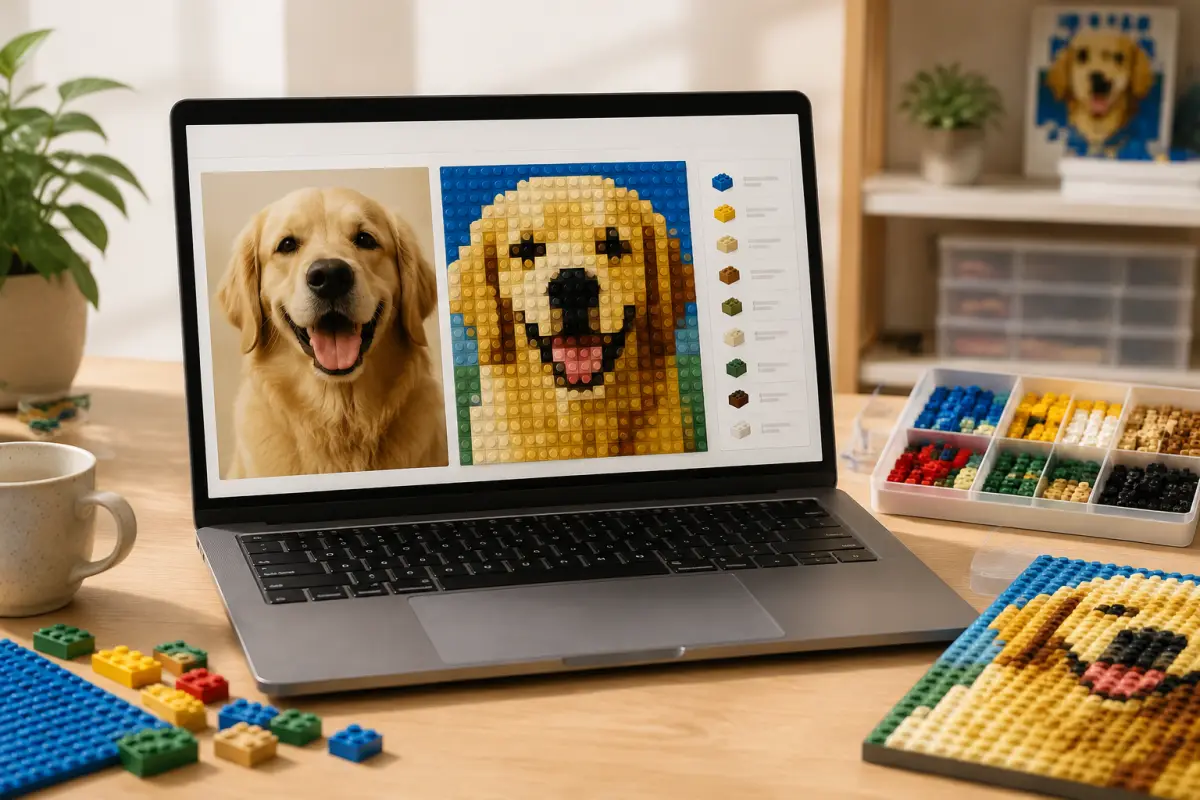
Practical example: a 48 × 48 pet portrait
Source picture
A sharp, well-lit dog portrait with the head filling about two-thirds of the frame and a plain background.
Conversion choices
Square crop, 48 × 48 grid, classic palette, and a small brightness increase to separate dark fur from the eyes.
Build plan
2,304 grid positions, pieces sorted by palette color, HD pattern on a tablet, and construction in eight-row sections.
The first preview may show too much background and make the face look small. A closer crop usually improves recognition more efficiently than increasing the grid. If the eyes disappear, compare grayscale to diagnose weak contrast, then adjust brightness or select a larger grid. Once the ears, eyes, nose, and outer silhouette remain clear from a normal viewing distance, export the guide and use the parts list for planning.
Common conversion problems and fixes
The face is unrecognizable
Crop closer, strengthen tonal separation, or increase the grid. Do not spend many cells on an unimportant background.
The colors look muddy
Try a smaller, clearer palette. A mosaic often reads better with fewer distinct colors and stronger contrast.
Small details disappear
Decide whether those details are essential. Enlarge the grid only if the extra cells fit your budget, space, and build time.
The parts count is too high
Reduce the dimensions, simplify the crop, or redesign the background as a flatter color area.
The pattern is hard to follow
Use a high-resolution or printed guide, label orientation, sort colors, and complete one small section before moving on.
The final build looks different
Screen colors and physical parts vary. Treat the preview as a planning approximation and verify available colors before ordering.
Frequently asked questions
Can I turn a picture into a LEGO mosaic for free?
Yes. A browser-based generator can create the grid, preview, downloadable pattern, and color count without paid design software. Physical bricks and mounting materials are separate costs.
What picture format should I use?
JPG, PNG, and WEBP are practical choices. Use the clearest original file available. Brick Mosaic Maker accepts these formats up to 20 MB, 6000 pixels on either side, and 25 megapixels.
What size is best for a first portrait?
A 48 × 48 pattern is a useful starting point because it offers recognizable detail without immediately moving to a very large project. Test the picture at smaller and larger sizes before deciding.
Does every cell require a 1 × 1 brick?
Not necessarily. The pattern describes color positions. Depending on the design, you may combine adjacent same-color areas with larger elements, but confirm that your construction stays aligned with the grid.
Will the mosaic look exactly like the photograph?
No. A brick mosaic deliberately simplifies the source into fewer cells and colors. Aim for a recognizable subject, strong silhouette, and practical build rather than photographic accuracy.
Is the uploaded picture private?
Brick Mosaic Maker performs conversion locally in the browser. Download finished patterns you want to keep because local browser history is not a cloud backup.
Create a test pattern before buying pieces
Upload one clear picture, try a 48 × 48 crop, and compare at least two palettes. The preview and color count will show whether the idea is worth turning into a physical mosaic.
LEGO® is a trademark of the LEGO Group, which does not sponsor, authorize, or endorse Brick Mosaic Maker. The site is an independent tool for creating brick-compatible visual patterns.