Best Photo for a LEGO Mosaic: 7 Practical Rules
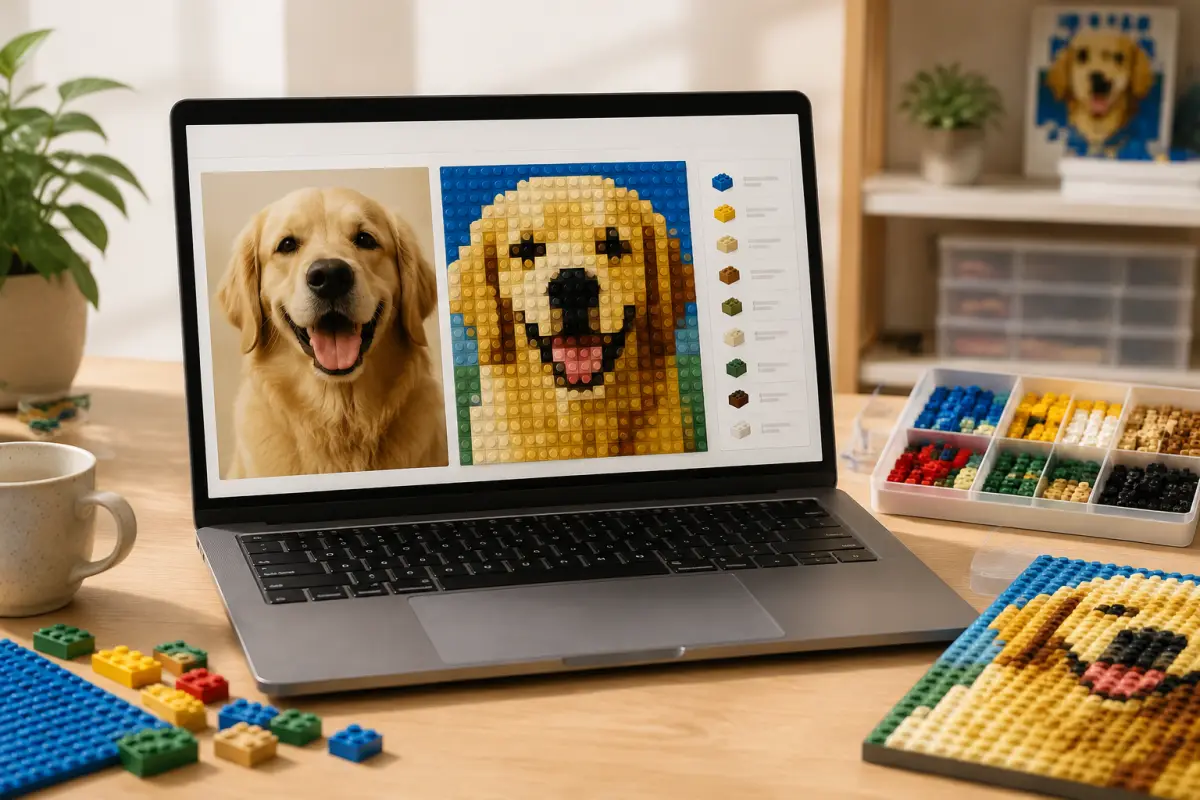
A strong source image makes it easier to create a recognizable brick mosaic. Brick Mosaic Maker turns a JPG, PNG, or WEBP image into a color-cell pattern, lets you choose crop or fit, grid size, palette, and brightness, then provides a preview, a color parts list, and PNG or print exports. Use these rules before you generate your pattern.
What makes a photo work for a brick mosaic?
A mosaic reduces an image into a fixed grid of colored cells. The best photos have one clear subject, visible shape boundaries, and enough light-to-dark separation for the subject to remain readable after the grid and palette simplify it.
7 practical rules for choosing your photo
1. Make one subject the focus
Choose a portrait, pet, logo, artwork, or building where the main subject fills most of the frame. A face or pet is easier to recognize when it is not small compared with the background. For logos, use a clean version with distinct edges and avoid extra text or tiny marks that may disappear in a small grid.
2. Keep the background simple
Busy scenery can compete with the subject after the image is reduced to brick colors. Remove distracting borders where possible, keep the subject near the center, and select a background that separates clearly from the important outline.
3. Use even, useful light
Start with a well-lit image. Very dark photos can hide key features, while washed-out photos can lose shape definition. When a photo needs a small adjustment, use the brightness control and compare the generated preview before you download the guide.
4. Look for contrast, not just bright colors
Contrast between important areas helps a mosaic read from a distance. Check that the face and hair, pet and background, or logo and surrounding space have different lightness values. If color is less important than form, try the grayscale palette to emphasize the outline.
5. Match the crop to the subject
Use Crop when the subject matters more than the edges of the photo. It fills the selected grid and keeps more detail on the focal area; move the crop position until the face, pet, or logo is placed well. Use Fit when the complete image matters, including wide scenery or a full logo, because it keeps the whole photo visible within the grid.
6. Choose a grid that supports the detail
Generate a smaller test first. A 16 x 16 grid is useful for a quick check, while the site identifies 48 x 48 as a practical portrait starting point. If a facial feature or logo shape is lost, try a larger grid. The available custom grid controls allow up to 128 x 128 pieces, so increase detail only after the preview shows that it improves the design.
7. Select palette and export after previewing
Classic colors create a familiar brick look, soft colors give a gentler illustration, and grayscale concentrates attention on shape. Review the preview and the parts list before treating the pattern as final. When it is ready, download a high-resolution PNG or use the print export with the needed width and resolution; Web, HD, Print, and Custom pixels are available for different reference needs.
Recommended workflow in Brick Mosaic Maker
- Upload an original JPG, PNG, or WEBP file when possible instead of a compressed screenshot.
- Choose Crop or Fit, then position the focal area when cropping.
- Select a preset grid or enter a custom width and height.
- Choose a palette and make a brightness adjustment only when the source needs it.
- Generate the mosaic and inspect whether the subject still reads clearly.
- Check the color quantities in the parts list before planning or sorting pieces.
- Download PNG or print the pattern and parts list as a PDF for building.
Examples
Portrait
Use a close, well-lit portrait with the face centered and separated from the background. Start with a 48 x 48 grid, then use a larger grid if the preview loses important features.
Pet
Pick a pet photo where the head or body has a clear outline against the background. Avoid motion blur and a background with similar brightness to the fur.
Logo
Use a high-contrast logo with broad shapes. Crop closely around the mark or choose Fit when the complete mark and its surrounding space are important.
Common questions
Does the image leave my device?
No. The site states that conversion happens locally in the browser and the source photo stays on the device.
Should I use a dark photo?
Try it only after checking the preview. If details are hard to see, choose a brighter source image or adjust brightness, then compare the result.
How do I know how many pieces I need?
After generation, the parts list counts the color cells in the pattern so you can plan the pieces by color.
Can I keep the whole image?
Yes. Choose Fit when every part of the source image matters. Choose Crop when you want the subject to fill the selected grid.