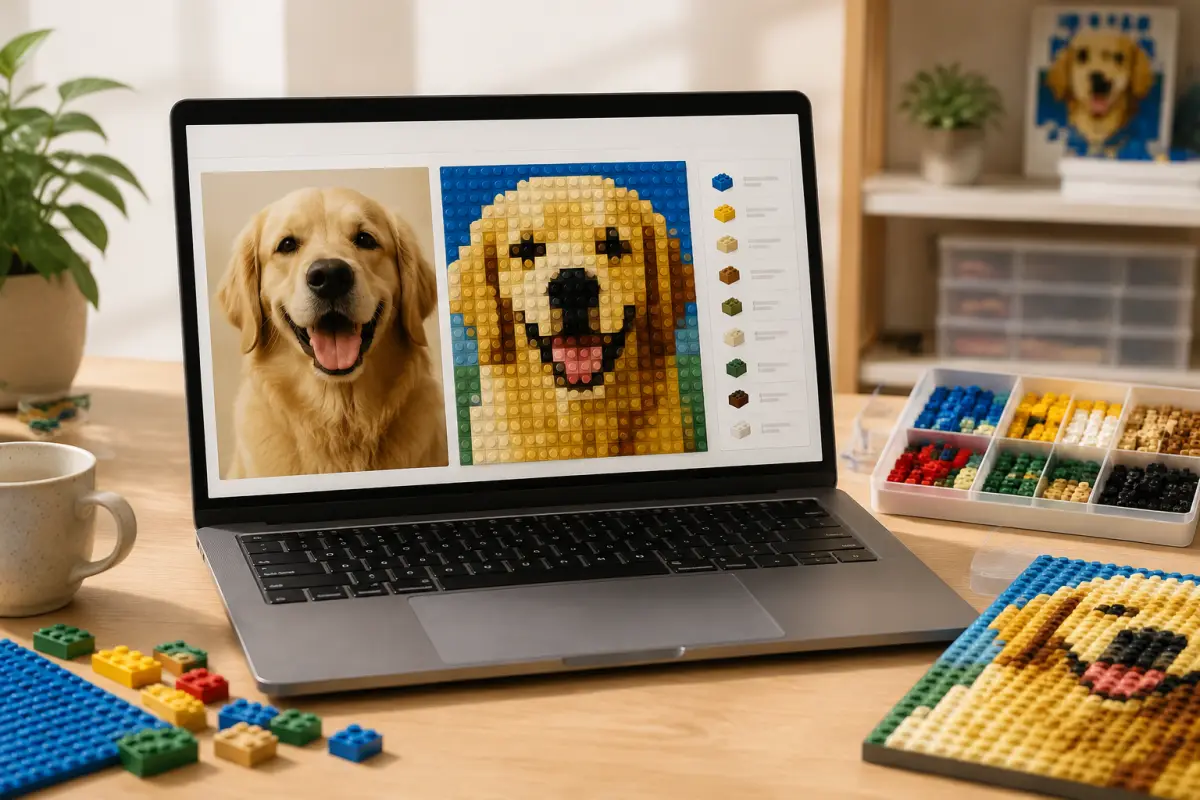
LEGO Mosaic Generator With a Parts List: From Photo to Finished Build
A photo becomes much easier to build as a brick mosaic when the design includes both a clear grid and a parts list. Brick Mosaic Maker combines those two planning steps in one browser-based workflow: choose a photo, reduce it to a grid, review the color mapping, and read the exact quantity shown for each generated color before you sort or buy pieces.
What the LEGO mosaic generator provides
Brick Mosaic Maker runs in the browser and does not require an account. Your selected photo is processed locally on your device rather than uploaded to a remote account. The tool accepts JPG, PNG, and WEBP images up to 20 MB, with a maximum width or height of 6,000 pixels and a maximum of 25 megapixels.
The result is a square-cell mosaic preview with three useful planning outputs:
- A visual pattern that shows the position of every color cell.
- The selected grid dimensions and total number of cells.
- A Parts list that groups the cells by generated color and shows the quantity for each color.
This makes the generator useful for the transition from photo to finished build, but the list is still a planning reference. Check the real pieces you own, the brick dimensions you intend to use, the backing or base, and the mounting method separately before ordering.
Step-by-step: create a photo mosaic with a parts list
1. Choose a clear source photo
Open Brick Mosaic Maker and use the photo area labeled “Drop a photo here” or click to choose an image. A well-lit subject with strong edges usually produces a more readable pattern than a dark, blurred, or highly textured image. Faces, pets, logos, buildings, and simple artwork work well when the important shapes occupy a large part of the frame.
After selecting a file, review the source preview. Use Replace to test another image or Remove to clear the current file. If the original camera image is unusually large, resize it so it stays within the displayed file and pixel limits.
2. Select the pattern size
Choose a preset from Pattern size. The available presets are 16 x 16, 48 x 48, 64 x 64, 96 x 96, 64 x 48 landscape, and 48 x 64 portrait. Custom size lets you enter a width and height from 8 to 128 cells.
| Grid | Total cells | When to try it |
|---|---|---|
| 16 x 16 | 256 | Quick tests, bold symbols, and simple silhouettes. |
| 48 x 48 | 2,304 | A practical starting point for a square portrait. |
| 64 x 48 | 3,072 | Wide images that benefit from a landscape layout. |
| 48 x 64 | 3,072 | Vertical subjects that need a portrait layout. |
| 96 x 96 | 9,216 | More detail when a larger build is acceptable. |
The total cell count is the first number to use for planning. For a complete pattern, width multiplied by height equals the total number of cells. The color quantities in the Parts list should add up to that same total after generation.
3. Choose Crop or Fit whole image
Crop is selected by default. Use it when the main subject matters more than the edges of the source. Drag the image to position the focal point, adjust Crop zoom from 100% to 300% when available, and use Reset to center if the framing becomes difficult to control.
Choose Fit whole image when every part of the photograph must remain visible. This preserves the complete image inside the selected grid, although different aspect ratios can leave unused space around it. For a wide photograph, the 64 x 48 landscape preset may be a better starting shape.
4. Select a color palette
The Color palette menu provides Classic brick colors, Soft colors, and Grayscale. Classic is a useful first test for a familiar brick-style appearance. Soft colors gives the image a gentler color treatment, while Grayscale focuses on light, shadow, and shape.
Generate the same crop with more than one palette when the subject is important. Compare the overall outline first, then check whether small defining areas remain distinct. The palette names in the output are generated color references; compare them with the colors and pieces actually available to you before purchase.
5. Adjust brightness only as needed
Brightness ranges from 70% to 130% in 5% steps, with 100% as the starting value. Lower it when pale areas appear washed out or merge together. Raise it when shadows become one dark block and important shapes disappear. Change one setting at a time and generate again so you can tell which adjustment improved the result.
6. Generate and read the Parts list
With the photo and settings ready, select Generate mosaic. The Mosaic preview area displays the pattern, grid information, and the Parts list. The list shows the exact number of pattern cells assigned to each generated color. This is the key “颜色数量” and piece-count step: it converts the visual result into a sortable quantity checklist.
Use the Preview zoom control, which ranges from 100% to 400%, to inspect individual cells. First verify the subject outline, then inspect eyes, lettering, narrow edges, and other details that might be lost at a smaller grid size. If the result is unclear, try a tighter crop or larger grid before buying pieces.
How to use the Parts list for purchase preparation
Separate design counts from physical inventory
Start by recording the total cell count and each color quantity shown by the generated list. Then make a simple inventory of the pieces you already own. Compare the two lists color by color and mark each quantity as available, short, or needing a substitute.
The generator counts color cells in the selected pattern. It does not identify a particular official element number, choose a backing plate, calculate a border, or verify that a specific shop has stock. Those physical decisions depend on the brick size, base layout, border design, and display method you choose.
Build a practical shopping checklist
- Save the generated pattern and write down the displayed total cell count.
- Copy every color and quantity from the Parts list into your project checklist.
- Sort your existing pieces by color and compare each group with the generated quantity.
- Decide how you will handle missing colors before ordering: buy the same color, test a visually acceptable substitute, or regenerate with another palette.
- Confirm the physical base, border, gaps, and mounting requirements separately.
- Keep the exported pattern with the final quantity checklist so the design and purchase plan stay together.
For a large mosaic, it is useful to divide the pattern into rows or sections and place each color group in a labeled tray. The Parts list tells you the total color quantities, while the preview tells you where those pieces belong.
Export a guide for the build
When the preview and quantities are ready, use Download PNG. The output-size choices include Web at 1,920 pixels, HD at 3,840 pixels, Print, and Custom pixels. Print lets you set a physical width from 5 to 60 cm and choose 150, 300, or 600 DPI. Custom pixels accepts a width from 256 to 8,000 pixels, with the matching height calculated from the pattern aspect ratio.
Use Web for a lightweight screen reference, HD when you need to zoom in farther, and Print when a physical worksheet is more convenient. Print / Save PDF opens the browser print workflow for the pattern and Parts list. Check the print preview before saving so the grid and quantities are readable.
Recent mosaics stay in the browser on the device where they were created. This history is not an online account or cloud backup. Download the PNG or save the PDF when you want a durable copy, especially before clearing browser data or moving to another device.
Examples of a sensible starting setup
Square portrait
Start with 48 x 48, Crop, 100% brightness, and Classic brick colors. Center the subject so the face or main object occupies enough cells. Generate once, confirm the outline, and then use the Parts list to compare each color quantity with your inventory. If key features merge, try a tighter crop or move to 64 x 64.
Wide travel photo
Try 64 x 48 landscape and Fit whole image when the surrounding scene is important. Check whether the different aspect ratio leaves too much empty space. If the subject is too small, switch to Crop and reposition the image before increasing the grid.
Simple logo or symbol
Test 16 x 16 first when the design has large shapes and little fine text. Inspect one-cell-wide lines, holes, and corners at higher preview zoom. Increase the grid only if those defining shapes are not readable, then review the new Parts list because every grid change changes the required color quantities.
Common questions
Does the Parts list show how many pieces I need?
Yes. After a mosaic is generated, the Parts list shows the quantity for each generated color, and the result also shows the complete cell count. Use those values as the color and piece-count basis for sorting and purchase preparation.
Do the color quantities include a border or backing?
No. The list reflects the generated pattern cells. A border, base, backing, mounting hardware, or intentional gap must be planned separately.
What should I do if I do not have one of the listed colors?
First compare the pattern with the real pieces you can obtain. You can decide whether a close visual substitute is acceptable or regenerate the pattern with Classic, Soft, or Grayscale. Recheck the preview and the updated Parts list after changing the palette.
Which grid size should I use for a portrait?
A 48 x 48 grid is a practical starting point for a square portrait. Use 64 x 64 or 96 x 96 when more detail is important and the larger build is acceptable. The best choice depends on the subject and the physical project size.
Is my photo uploaded to an account?
No account is required, and the site states that processing happens locally in the browser. Recent generation records stay in that browser on the current device, so export the pattern if you need to keep it.
Can I save the result as a PDF?
Yes. Select Print / Save PDF and use the PDF option in your browser print dialog. You can also download a PNG using Web, HD, Print, or Custom pixels.
Final checklist before ordering bricks
- The subject is recognizable at normal preview size.
- The grid shape matches the photo composition.
- The total cell count fits the planned physical build.
- The color quantities from the Parts list have been copied into a checklist.
- Your current inventory has been compared with every generated color.
- Substitutions, base, border, and mounting details have been decided separately.
- The PNG or PDF guide has been saved outside browser history.
Once these checks are complete, Brick Mosaic Maker gives you a practical bridge from photo to finished brick art: a readable pattern for placement and a color-by-color Parts list for sorting and purchase preparation.