How to Make a Printable LEGO Mosaic Pattern From Your Own Photo
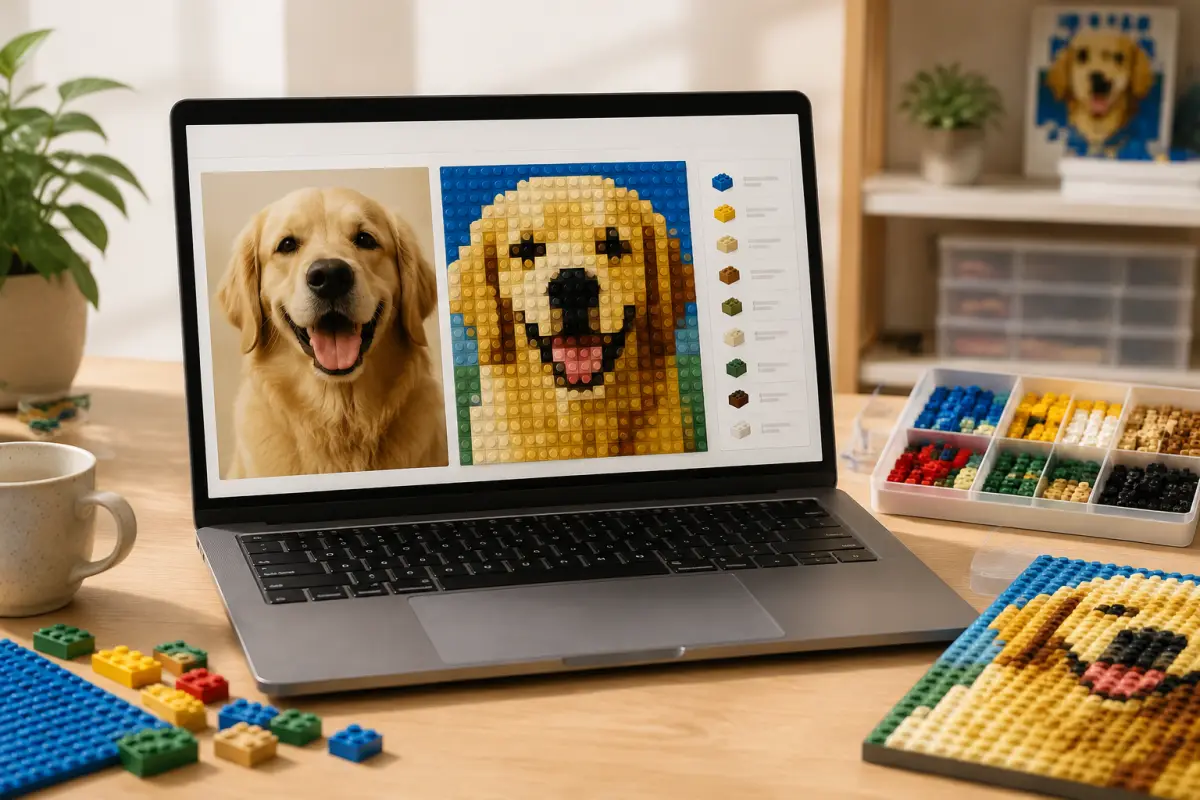
Brick Mosaic Maker turns a personal photo into a grid-based brick mosaic pattern that you can inspect, download, print, and build. This guide explains how to make a printable LEGO mosaic pattern from your own photo, how to choose a readable resolution, how to split a large guide into pages, and how to read the pattern while placing pieces.
Brick Mosaic Maker is an independent tool and is not affiliated with, endorsed by, or sponsored by the LEGO Group.
What the tool does
The homepage converts an image into colored cells. Each cell represents one position in the finished mosaic. The workflow supports JPG, PNG, and WEBP files up to 20 MB, runs in the browser, and provides crop or whole-image fit controls, grid presets, custom dimensions, three palettes, brightness adjustment, a color Parts list, PNG export, and Print / Save PDF.
Because the conversion happens locally in the browser, treat the browser history as temporary working storage. Download the finished PNG or save a PDF when you need a durable copy.
Step 1: Prepare and upload your photo
Choose a clear image with one main subject, visible light and dark areas, and enough contrast around important edges. Portraits, pets, logos, icons, and bold artwork are practical starting points. A blurry or crowded image can lose detail when reduced to cells.
Open Brick Mosaic Maker, drop the JPG, PNG, or WEBP file into the upload area, or choose it from your device. After the image loads, the editor shows the preview and the mosaic controls. Keep the original photo available so you can compare the generated pattern with it.
Step 2: Choose a grid that can be printed and built
The grid width and height determine both visual detail and the amount of work. Available presets include 16 x 16, 48 x 48, 64 x 64, 96 x 96, 64 x 48 landscape, and 48 x 64 portrait. Custom width and height accept values from 8 to 128 cells.
| Choice | Use it when | Printing and building note |
|---|---|---|
| 16 x 16 | The subject has bold shapes or you want a quick test | Few cells and simple rows are easy to mark on paper |
| 48 x 48 | You want a balanced starting point for a square portrait | 2,304 cells; a one-page view may be small, so consider pages or a screen guide |
| 64 x 64 or 96 x 96 | Important details disappear at a smaller size | More detail, more cells, and usually more printed pages or closer zoom |
| 64 x 48 or 48 x 64 | The photo is clearly landscape or portrait | Matching the aspect ratio can reduce unnecessary empty space |
Start with a smaller preview, then increase the grid only when the subject or an important edge is not readable. A larger grid does not automatically make a weak source photo clearer.
Step 3: Crop, fit, and tune clarity
Use Crop when the face, logo, or main object should fill more of the grid. Reposition and zoom the image, using Reset to center if the crop becomes difficult to control. Use Fit whole image when every edge of the original composition matters; different aspect ratios can leave empty space.
Compare the Classic brick colors, Soft colors, and Grayscale palettes. Classic generally keeps a stronger brick-like contrast, Soft gives a gentler illustration, and Grayscale emphasizes light and shape. Adjust brightness in small steps when the preview is too dark, washed out, or flat. Generate more than one version before printing.
Step 4: Make a printable guide
After generating the mosaic, review the preview from the distance where the finished piece will be seen. Confirm that the subject is recognizable, major edges are continuous, and light and dark regions do not merge.
Choose Download PNG to select an output size. Web is a lightweight screen reference, HD is useful for zooming, Print lets you set a physical width from 5 to 60 cm and choose 150, 300, or 600 DPI, and Custom pixels accepts a width from 256 to 8,000 pixels. Use Print when the paper dimensions matter; use HD when you will read the pattern on a tablet or laptop.
Choose Print / Save PDF to open the browser print workflow for the pattern and Parts list. In the print preview, check the paper size, scale, orientation, margins, and whether cell boundaries and color blocks remain distinct. Saving the PDF preserves the guide for later reprinting.
How to split a large pattern into pages
A large grid is easier to build when the paper guide is divided into labeled sections. Use the Print export at a physical width that keeps individual cells legible, then select a printer scale or paper arrangement that does not shrink the grid to an unreadable thumbnail. If the complete guide cannot fit on one sheet, print it across multiple sheets and keep the original row and column order.
- Print a small test section first and confirm that color blocks, row boundaries, and any coordinate labels are readable.
- Print the remaining pages with the same scale and orientation. Do not mix a fit-to-page setting with a fixed 100% section.
- Label pages by row and column, such as R1-C1, R1-C2, and R2-C1, from the top-left corner.
- Align neighboring pages by their outer grid lines and tape them on the back. Keep a visible overlap or a written page map so no row is skipped.
- Before placing pieces, compare the assembled paper guide with the on-screen PNG and confirm that the first cell is the same top-left position.
The tool creates the pattern and color quantities; page layout is handled by your browser or printer. If a page is too dense, increase the physical print width or use more pages rather than relying on a very small cell.
How to read the pattern while building
Read the guide like a coordinate grid. Treat the top-left cell as the starting point, work from left to right across a row, then move down one row. Keep the printed page orientation fixed and place the physical mosaic in the same orientation.
- Sort pieces by the colors shown in the Parts list before starting a section.
- Mark each completed row or small block with a pencil or removable note.
- Use the HD PNG beside the paper when a color block is hard to distinguish in print.
- Count cells, not just visible shapes. A 48 x 48 pattern has 48 columns and 48 rows.
- Pause at every page boundary and verify that the last cell on one page continues into the first cell on the next.
The Parts list reports the quantity for each generated color and the result shows the complete cell count. These values describe the pattern cells; a border, backing, base, frame, or mounting hardware must be planned separately.
Example: a printable 48 x 48 portrait
Upload a well-lit square portrait, choose 48 x 48, select Crop, and center the face. Generate a Classic palette version, then compare it with Soft and Grayscale. If the eyes or outline merge, try a closer crop, a modest brightness adjustment, or 64 x 64. When the preview is recognizable, export Print at a physical width that leaves each cell readable, save the PDF, and copy the Parts list into a sorting checklist.
For a wide travel photo, try 64 x 48 landscape and Fit whole image first. For a simple logo, test 16 x 16 and inspect thin lines before deciding whether a larger grid is necessary.
Common questions
What makes a photo suitable for a printable mosaic?
A clear subject, strong edges, and useful contrast usually produce a more readable grid. Crop closer or choose a larger grid when a small but important feature disappears.
What resolution should I print?
Use the Print export when you need a physical width and DPI choice. Test one section first; the correct resolution is the one that keeps each cell and color block readable at your working distance.
Can I print a large mosaic on several pages?
Yes. Use a consistent scale, label pages by row and column, align neighboring grid lines, and verify the page order before building. The browser print workflow controls the page arrangement.
How do I know how many pieces to prepare?
Read the generated Parts list for the quantity of each color and the total cell count. Add any border, base, backing, or frame separately because those are not part of the generated cells.
Will the printed guide look exactly like the photo?
No. The guide is a simplified color grid. Crop, grid size, palette, brightness, print scale, and viewing distance all affect how closely it represents the source.
Is my photo stored online?
The homepage states that conversion happens locally in the browser and no account is required for the workflow. Export the pattern if you need to keep it after clearing browser data or changing devices.
Final build checklist
- The selected grid matches the photo orientation and the planned physical size.
- The preview remains recognizable at normal viewing distance.
- The print test shows clear cell boundaries and distinct color blocks.
- Every page has a row-and-column label and the page order is recorded.
- Colors are sorted from the Parts list, with borders and mounting materials planned separately.
- The PNG or PDF guide is saved outside the browser before construction begins.
With a clear source photo, a readable grid, consistent page scale, and row-by-row checking, Brick Mosaic Maker provides a practical printable LEGO mosaic pattern you can follow from the first cell to the finished piece.